
Setting Up Ngrok to Local Services from Aparavi Data Toolchain for AI Cloud
This guide walks you through configuring Ngrok on your local machine to expose Local Service as Mysql or Qdrant to Aparavi Data Toolchain for AI Cloud, which runs remotely.
Prerequisites
-
You have the local service running.
-
You can open terminal/command prompt.
-
You can install third-party software (Ngrok).
Create an Ngrok Account
-
Go to ngrok | API Gateway, Kubernetes Ingress, Webhook Gateway
-
Click Sign up and follow the steps.
-
Once signed in, navigate to the “Your Authtoken” page:
-
You’ll find your personal API key/token used to authenticate the CLI.
-

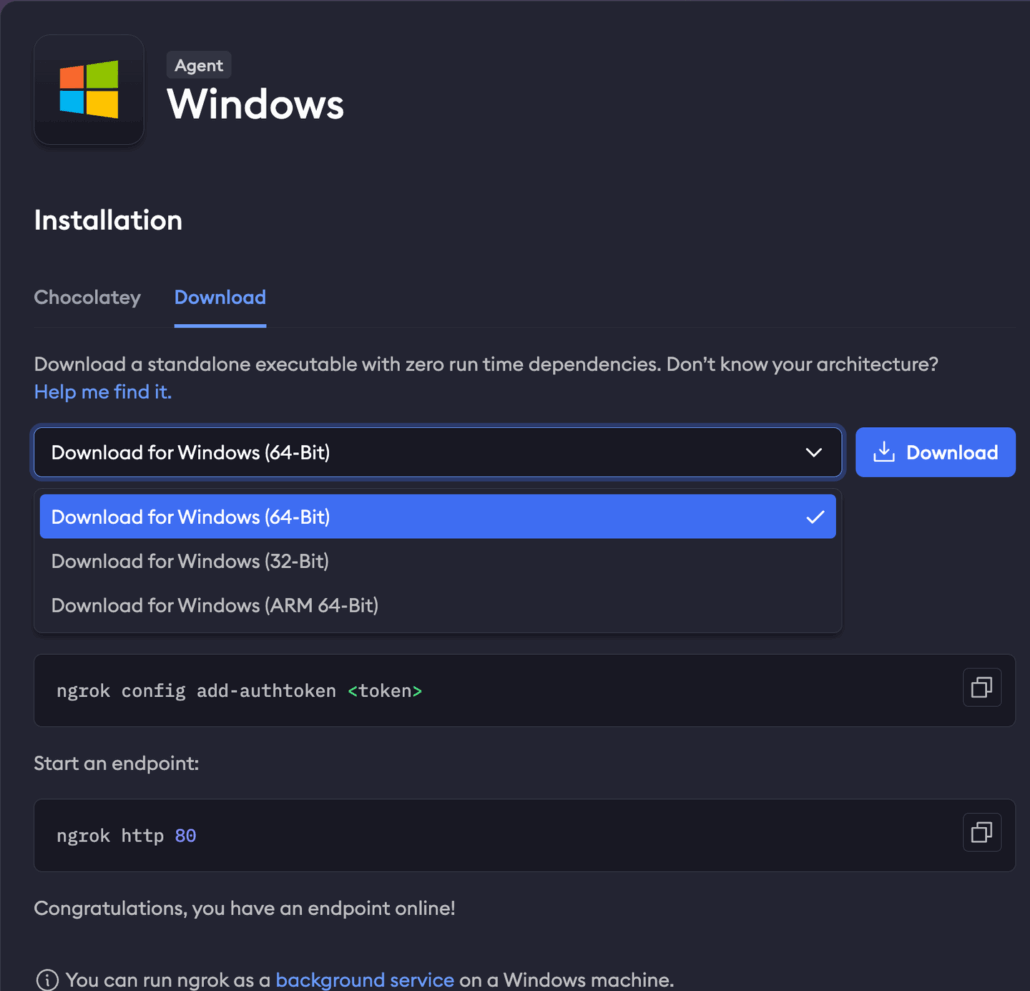
Install Ngrok CLI
Install Ngrok on your local machine:
Mac (Homebrew):
brew install ngrokLinux (Snap):
snap install ngrok Windows (chocolatey):
choco install ngrokWindows:
Download the appropiate installer from official ngrok page download page
Other Systems can check the official download page
Authenticate Ngrok CLI with Your Token
After the ngrok installation run the following command to link your Ngrok client with your account:
ngrok config add-authtoken Replace <YOUR_AUTHTOKEN> with your account token.
Expose Local Ports
Run Ngrok tunnels for the local service.
ngrok tcp --region=usBelow an examples for QDRANT:
Qdrant (Default port 6333):
ngrok tcp 6333 --region=usThis will output a tcp:// forwarding address like:
tcp://1.tcp.ngrok.io:12345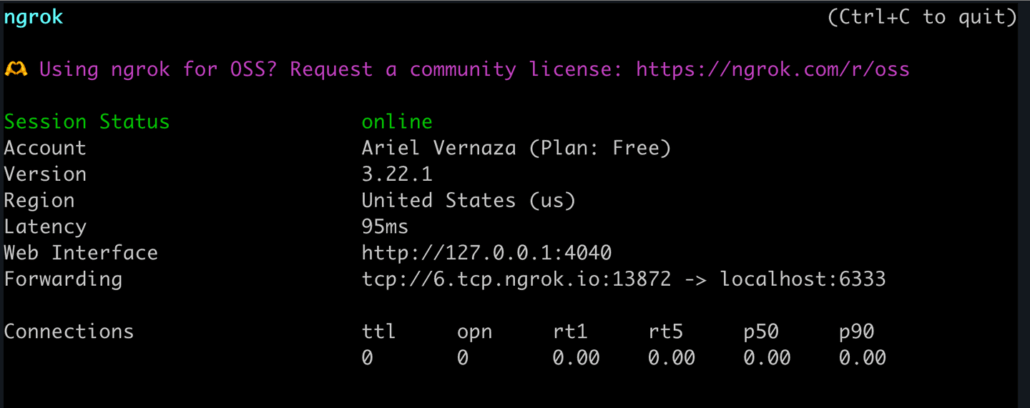
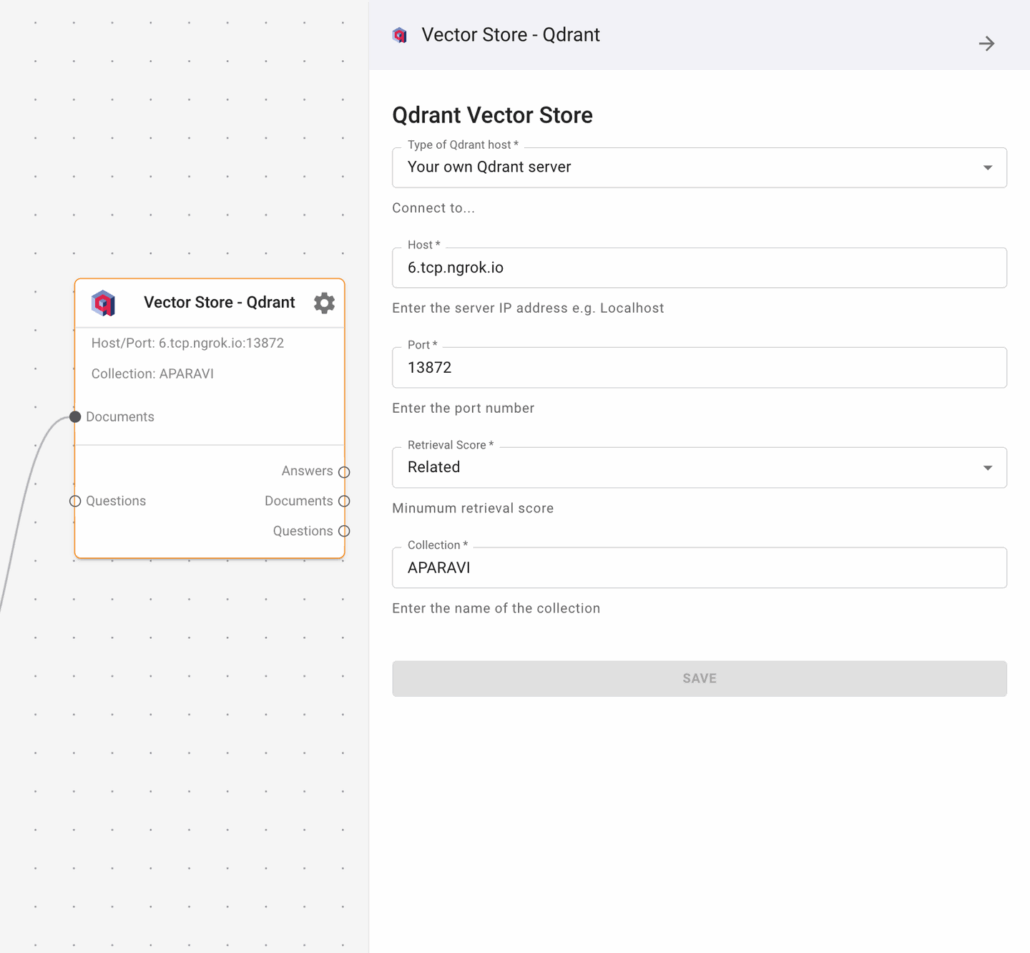
Provide Connection Info to Aparavi Data Toolchain for AI Cloud
Send your exposed connection info (host and port) to configure it in your dashboard. For example:
Qdrant:
-
Host:
1.tcp.ngrok.io -
Port:
54321
Ngrok now securely tunnels your local services to DTC SaaS.
⚠️ Note: If you stop Ngrok and restart it later, for the free account, the public address and port will change. Be sure to update DTC SaaS with the new connection details if needed.